


Photo Gallery
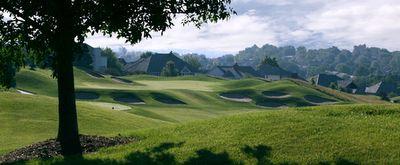
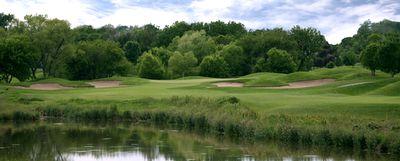
Hole 1
A very long and difficult starting hole. The fairway is very generous and extra distance is achieved due to the downhill tee shot but that's where the difficulty begins. The second shot has to be hit from an uneven lie into a green which has a water hazard guarding the front. Take your four on this beginning hole and move on.
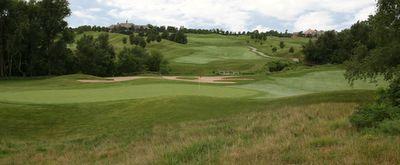
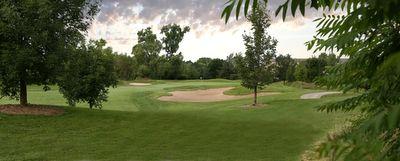
Hole 2
The first of multiple risk / reward holes at Champions Run. The fun begins on the tee shot with a hazard and group of trees that need to be navigated. A good tee shot definitely gives you a decision to make on your second shot. Find the green on your second shot and you should make birdie but a mishit is sure to find the hazard short and right of the green. Two well struck shots should give you a good chance at birdie on this par 5.
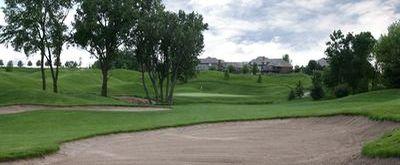
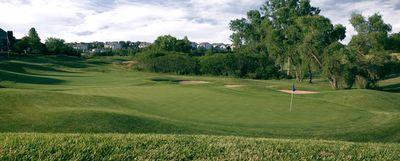
Hole 3
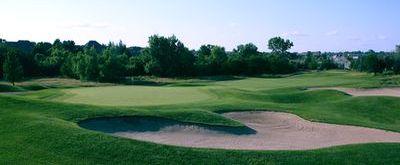
A pretty straighforward par 3. Pay upmost attention to the pin location. It is very crucial to find the right quadrant due to the size of this green. Also, make sure not to short side yourself in the grass bunkers right of the green. Up and down is very difficult from this location. A well struck tee shot should give you and easy par on the medium length par 3.

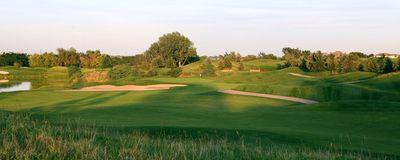
Hole 4
This is another one of the risk/reward holes on the front nine. Longer hitters will have the option of trying to drive the green, which is well protected by greenside bunkers or lay up in the fairway and have a short iron into this double tiered green. Be careful though, if you miss this green, an up and down is not easy!
Hole 5
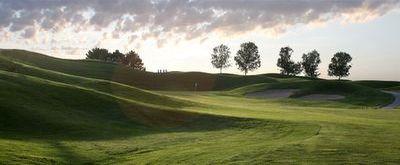
This hole is a favorite of course architecht Jeff Brauer due to the stadium setting around the green. This straight away medium length par 4 looks simple from the tee box but do not let it fool you. A group of trees right of the fairway will collect any wayward tee shots and do not miss the green long on your second shot or you will be chipping downhill onto a two tiered green.
Hole 7
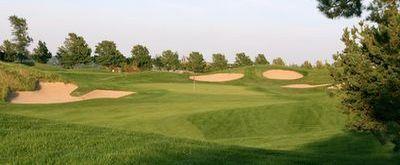
Tee off from an elevated tee to this straight forward par 4. A large bunker left of the fairway and tall mounds right of the drive area makes hitting the fairway a premium. The green is well bunkered with a large deep bunker front left and 3 pot bunkers behind the green. The back of this green slopes severely back to front so make sure your approach shot is not past the pin.
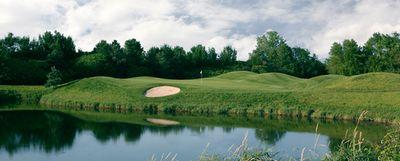
Hole 8
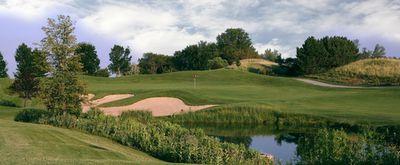
This par 3 looks easy from the tee but watch out where your tee shot finishes. The pond in front does not really come into play but if you hit your shot left of this green a large deep bunker awaits you. This green tilts back to front and right to left. If you miss the green on the hillside right, you will have a hard time keeping the ball on the green when chipping. A pin placement of back left or right creates problems if your tee shot winds up above the hole. If the pin is in the front and your tee shot is short, the ball will roll down the false front of the green back into the fairway for a hard up and down. Placement of your ball on this green is key to making par.
Hole 9
This is the other driveable par 4 on the front nine that the course designer laid out at Champions Run. The long hitters can take a chance and drive the ball onto the green and have a putt for eagle. The risk is hitting the tee shot left of green into the fescue or into a large bunker left of the green. If you miss hit your drive, you might also wind up in one of the pot bunkers in front of the green. This makes for a long bunker shot with the added difficulty of not seeing the green. The safe play is to hit a hybrid club or long iron onto the lower fairway which will give you a 70 to 90 yard pitch shot onto the green. The green slopes back to front with not much undulation. If the pin is back right....don't be above the hole! This hole is a great spot to watch during the Nationwide Tournament due to many of the players hitting the green and putting for eagle. Chip Beck made a hole-in-one on this hole during the tournament in 2003! Jason Gore made eagle on this hole during the tournament in 2005 to shoot the current course record of 59!!!!
Hole 10
How much do I want to cut off is the biggest question to ask yourself when teeing off on this 563 yard down hill par 5. Several Pine trees line the right side of the hole, encouraging the player to stay on the left side of the fairway. Depending on the length and accuracy of the drive, this hole can play as a three shot hole or an eagle opportunity short par 5. If going for this hole in two, you are sure to have a down-hill lie when hitting your approach shot. A creek that passes through the course, and one of the biggest bunkers on the course protecting the green, will encourage the player to error on the long side, while fescue grasses and side-hill lies lurk in the background. This is a true risk reward par 5 that allows the player an opportunity to either start the back nine under par, or makes you wonder how the opportunity slipped away.
Hole 11
The number one handicap hole lives up to it's expectations in more ways than one. An accurate drive is most important on this hole. Arrant tee shots leave the player out of bounds or in a bunker right, while a water hazard and another bunker is trouble left. A perfectly placed tee shot is just right of the main fairway bunker on the left, leaving the player 130 yards into the hole. A group of tall trees protect the left side of this hole while one of the smallest greens on the course is just a few steps long of the creek. Controlling your spin will be a main concern when hitting the second shot. Sloping from back to front, without a flat spot on it, this green is considered one of the most difficult to get your ball to "sit" when hitting an approach shot or putting. You may be gaining one on the field with par on this hole.
Hole 12
This hole is one of the scariest tee shots on the course. It usually is a mid to long iron with the wind behind or right to left. There is trouble left with the water hazard and small pot bunker. If you try and bail out to the right, you will find yourself in the long grass around the green with an uneven lie to deal with. A front flag placement teases you into trying to hit it close but makes it easy to leave it short in the hazard. Club selection is very critical on this hard par 3!
Hole 13
This is a great par 4 that makes you trust your swing off the tee. A water hazard runs along the entire left side of this hole. The wind is usually blowing left to right so at times you might have to take your drive down the water line to keep the ball in the fairway. The right side of the fairway has a large grass bunker in the drive zone area. The grass can get pretty long in this area and you might even have to hit a ball at waist high due to the uneven lies. The green is heavily bunkered and it may make you hit 1/2 an extra club to get the ball into the middle of the green.
Hole 14
Standing on this tee and looking down the fairway makes you want to bail out to the right. A hazard runs the entire length of this hole on the left side. This is another hole that you must trust your swing off the tee. Aim at the fairway bunker straight through the fairway for a good target off the tee. If you miss too far to the right off the tee, you might find yourself in the sumac! The green is pretty flat so if you hit a good drive, this is a potential birdie hole.

Hole 15
This is one of our longest part 4's on the course. Aim your tee shot to carry over the fairway bunker and your ball will hit the speed slot in the fairway. This green has a false front so make sure you take 1/2 to 1 more club to land the ball on the green. A hazard runs along the entire left side of this hole and comes into play closer to the green. A shot pulled left of the green from the fairway might kick into the hazard.
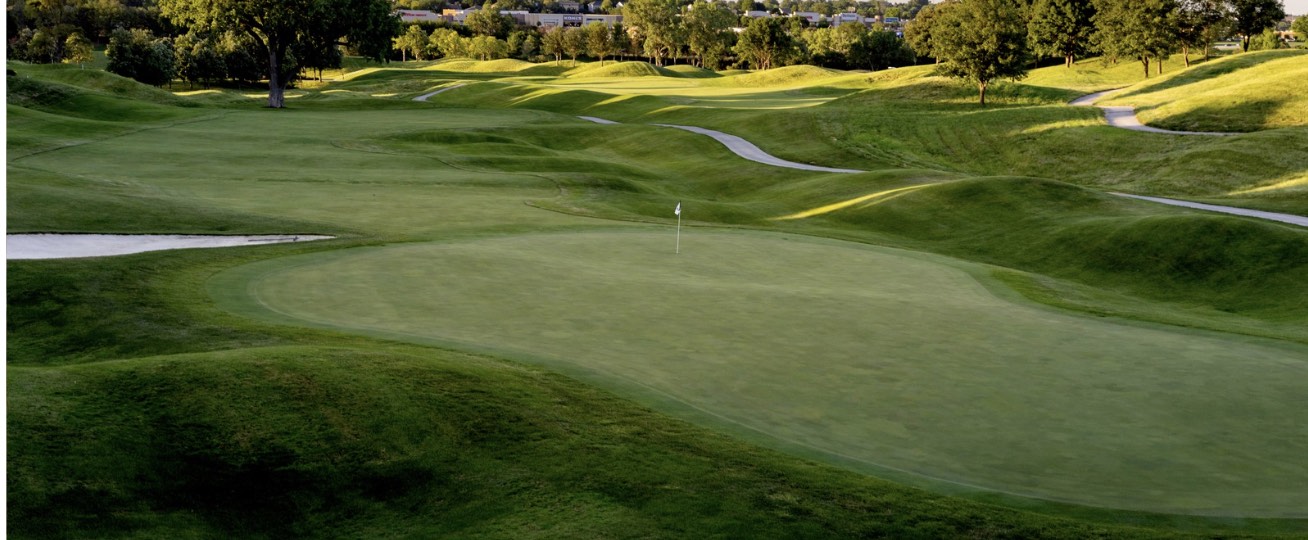
Hole 16
We feel this is one of the hardest par 3's in the state of Nebraska. The hole usually plays into the South wind and the green is very long from front to back. This green slopes from right to left towards the bunker left of the green. A shot that winds up right of the green will be a very difficult up and down. The bunker left of the green catches many shots and can be an easier up and down compared to missing the green right. The back left pin placement is the hardest place on this hole. Hope for a 3 and move onto the next hole.
Hole 17
The final par 5 on the course gives you an opportunity to make birdie. Don't try and cut off too much of the corner on the dog leg right....you might find yourself up in the fescue on the side of the hill. You will need to be lucky to find your ball in this thick native grass. A large landing area short of the bunker along the lake gives you alot of room to lay up for your 3rd shot. The middle left pin placement on this green can be tricky so make sure you get your 3rd shot over the green side bunker.
Hole 18
This is one of the most challenging finishing holes you will play. The split fairway gives golfers the option of playing conservative and having a blind shot into the large undulating green, or going for the well protected lower fairway which will prove to be beneficial on your second shot.